Winter Shoot
|
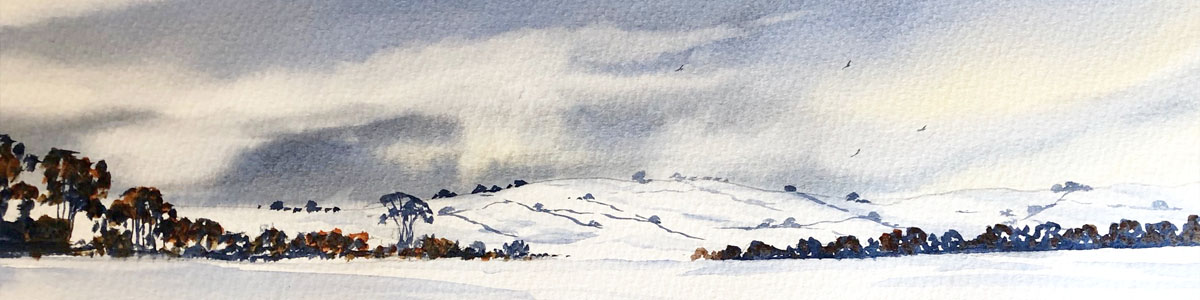
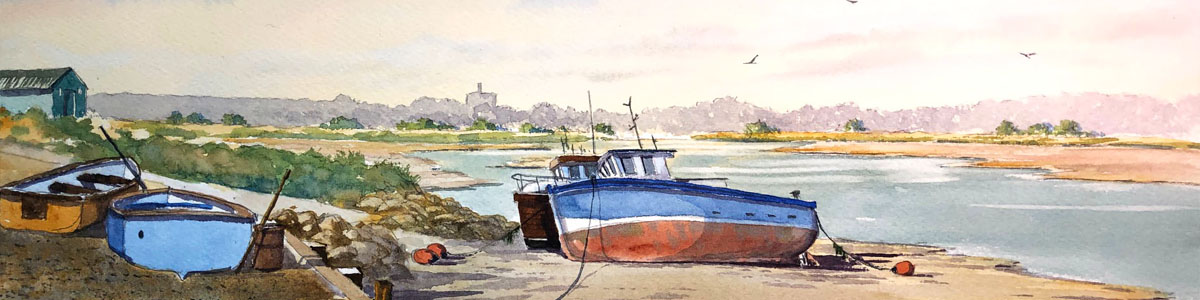
Step 1 Here is a lovely scene of the River Coquet which is literally only about 3 fields away from my house here in Northumberland. Its a fairly big canvas using acrylics. Firstly I pre stained the canvas using yellow ochre. Use the biggest brush you’ve got to fill it in. It really doesn’t matter how scruffy it looks as long as it all covered. Let it all dry. The next stage was to slap the skywash on and I’ve only used 2 colours. Cobalt blue and titanium white. And you will notice that I have kept the blue darker at the top and eased the white in from the base of the sky creating a bit of a diagonal feel to the clouds. |
 |
|
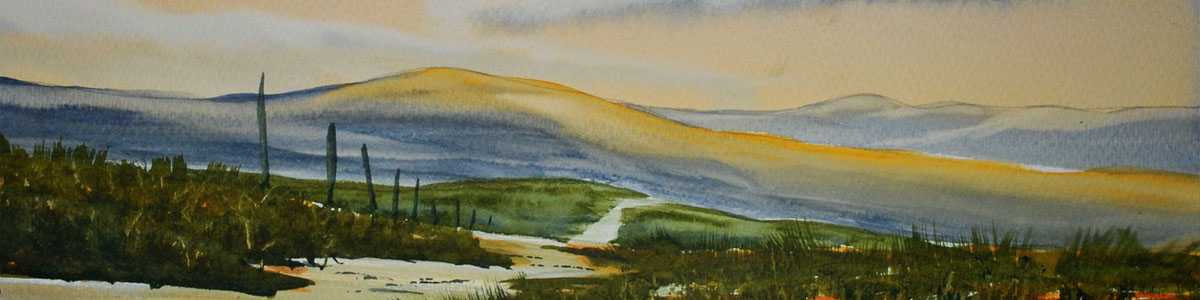
Step 2 For the distant trees I used my 1″ washbrush and firstly stippled on a little bit of cobalt blue mixed with alizarin crimson just to add a tiny touch of purple in there. Then stipple on raw umber followed by a little bit of burnt sienna and let all of this stuff dry. Once it had dried I then with the same brush stroke I stippled on some paynes grey and at the same time, still with paynes grey create a few trunks here and with my rigger brush. Again once all this had dried and with the same brush I tapped in a little bit of white here and there and a little bit of naples yellow to add some light. Now back to my 1″ wash brush and fill in the middle distance area of snow, using titanium white and then merge in a little bit of titanium white and cobalt blue mixed. |
 |
|
Step 3 Now for the trees in the middle distance but firstly I put on a little bit of white on the middle distance hill mixed with cobalt blue and let this dry, then again with my 1″ wash brush I stippled on a little bit of raw umber followed by raw sienna to get that feel of rough growth coming up from the snow. Once all this had dried I turned to my rigger brush and painted the more distinct trees using firstly raw umber followed by paynes grey to the darker side, and a few little hints of naples yellow here and there to capture some light. For the tops of the trees I used raw umber mixed with a touch of paynes grey and a practically dry 1″ brush and just literally scrap the surface of the canvas to form the canopy . At this stage I did the other side of the river, very simply with cobalt blue and white so I have no got the edges of the both sides of the river painted. |
 |
|
Step 4 |
 |
|
Step 5 |
 |
|
Step 6 Don’t be phased by this big bank of bushes on the left. Its big brush stuff and I had hardly any water in my 1.5″ brush and start off stippling on paynes grey mixed with raw umber, just block it in. Once it had dried I got a mixture of raw umber and burnt sienna. Stipple this on top here and there followed by raw sienna, again just stipple on here and there. Then a little bit of naples yellow, same technique and then to my rigger brush and paynes grey and indicate a few twigs, bows and trunks here and there. Once all this had dried I stippled on a scattering of snow using titanium white. Finally back down to the river bank, just put a little bit of paynes grey for darker edges in the snow leading down to the river. |
 |
|
Step 7 For these big trees on the right, its exactly the same techniques and colours as the big clump that we have just done on the left. But get all the colours much stronger because its getting nearer, and you will notice that I have put a little bit more white into this area but also painted more twigs and general scratty bits coming out from the bulk and for these I again used my rigger brush. |
 |
|
Step 8 More distinct trees in the foreground, I switch to my round brush for these, again I am using the same colours just a lot stronger and more of it. I filled the whole tree in first using raw umber and paynes grey mixed. Then paynes grey to the darker side, and a few bits of naples yellow to the lighter side. Be careful when you paint the twigs with your rigger brush, this time they actually need to be joined to a tree. |
 |
|
Step 9 This is the first stage of the other big foreground trees and again my No 8 round brush for this stage I used just used paynes grey and raw umber mixed, very strong and very dark. |
 |
|
Step 10 For the rough stuff at the base of the trees, well I don’t really need to tell you do I, you have already done it about 3 times in this picture, using the same colours and the other clumps of bushes, but to stress again, getting stronger. |
|
|
Step 11 |
 |
|
Step 12 For the trouser for the middle character I used paynes grey and titanium white for the one on the left, again raw umber mixed with raw sienna. For any little detail such as sticks and gun I used my rigger brush and paynes grey.
|
 |
|
Step 13 Now for the big bits. Bash on loads of titanium white using your biggest brush and let it dry.
|
 |
|
Step 14 Using the mixture of raw umber and burnt sienna and a split dry brush just tap on very lightly here and there to give a little bit of roughness and tiny bits of grass poking up from under the snow going slightly further away, basically adding a bit of texture to the snow. There we go a very big project this one, I hope you enjoy it.
|
 |
You must be logged in to post a comment.